My home network
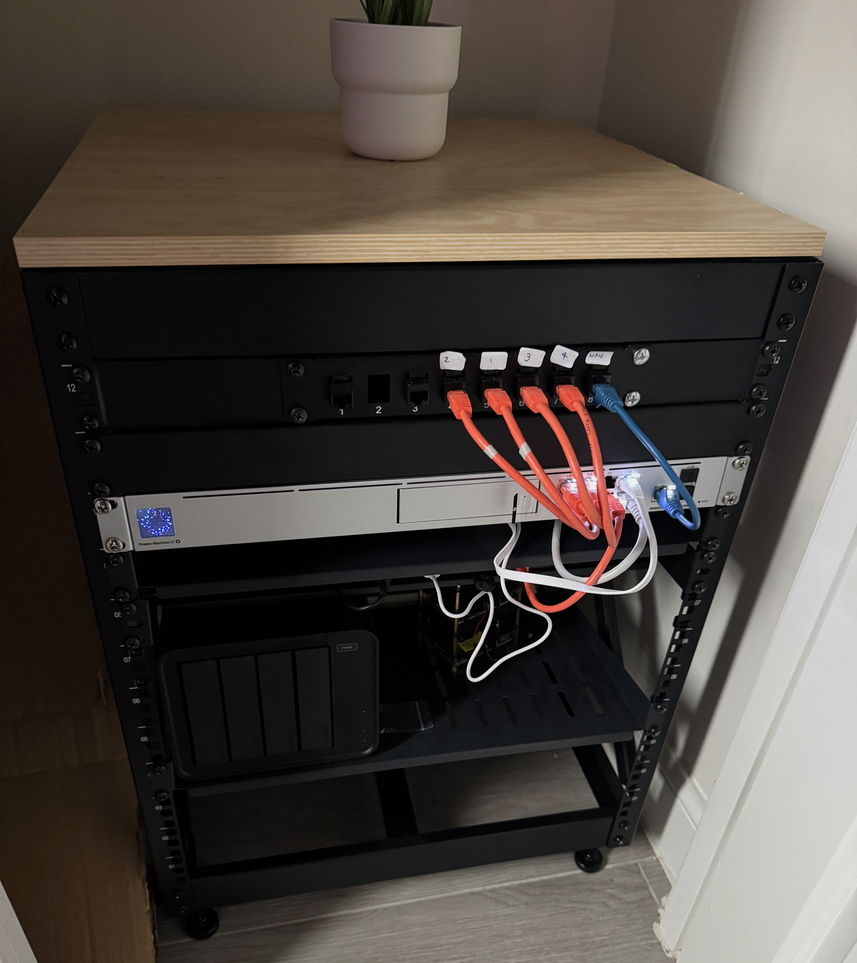
I’ve become a rack guy.
This has been my obsession over the past few years. Whilst I’ve had various bits of network equipment, SoHo cabinets and a whole lot of chaos going on in the house over the past few years, this is the first time I’ve actually gotten myself a proper rack and I’m really pleased with it.
But this post I want to talk about my home network and all the bits I’ve put together to make it work, it’s not very interesting or novel but this sort of setup is something I’ve wanted for a long time and I just wanted to write about it and how I got here.
If you want a more informative post about home network racks, I highly recommend this post from Michael Lynch, he goes into way more detail and I found it useful.
The network
I’m lucky enough to have ethernet in some of the rooms of my house. This is not common in the UK, but newer build properties like mine are being built with CAT6 in the walls. Obviously it’s possible to retrofit cabling in UK houses but it requires some chopping and chasing to get everything in place, so it’s nice to have had that already done when I moved in. In hindsight I wish I’d requested more drops throughout the house but oh well, it’s good enough.
The drops all end at a point in a small cupboard on the ground floor, 4 ports in total one for each area, this is where the rack lives. Here’s a crude drawing of what the network looks like right now:

It took a while to get to this point though, so I’ll document the journey…
A bit of history…
When I moved in the ISP just provided a shitty router, which suits most people, but I wanted take advantage of the full setup with PoE access points etc and use all the ports in the rooms. This led me to the “pro-sumer” market which is a minefield of expense, and made a bunch of mistakes a long the way.
My initial foray was to not bother with a full size rack and purchase something smaller, the 10” “SoHo” cabinets seemed much cheaper, along with the gear that fits in it. The first thing I bought was a 6U cabinet, fitted with some shelves. For networking I settled on some TP-Link Omada gear, mainly the ER605 router, OC200 controller, 10 port PoE switch along with a few WiFi access points and mini-switches to put around the house, powered by PoE.
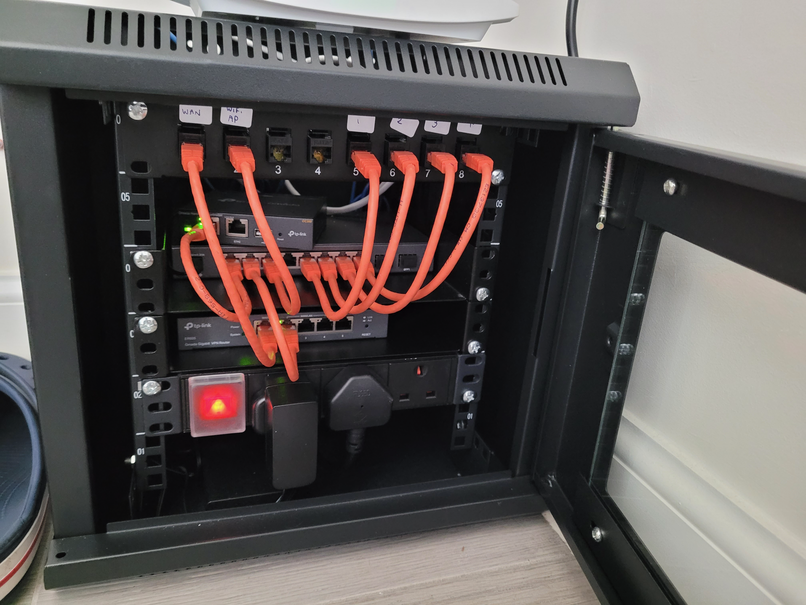
…and honestly? This served me well for a few years, it was great having everything nice and neatly tucked way in a little box in the cupboard, and outside of the Omada controller software/web interface being dogshit slow to navigate it worked well enough, and the experience of being able manage the router, switch and APs from one control surface was good.
But then the first problem arrived, soon after I purchased a 1L mini PC for self hosting/homelab purposes, to replace a set of Raspberry Pi’s that were becoming cumbersome to manage and constrained by RAM.
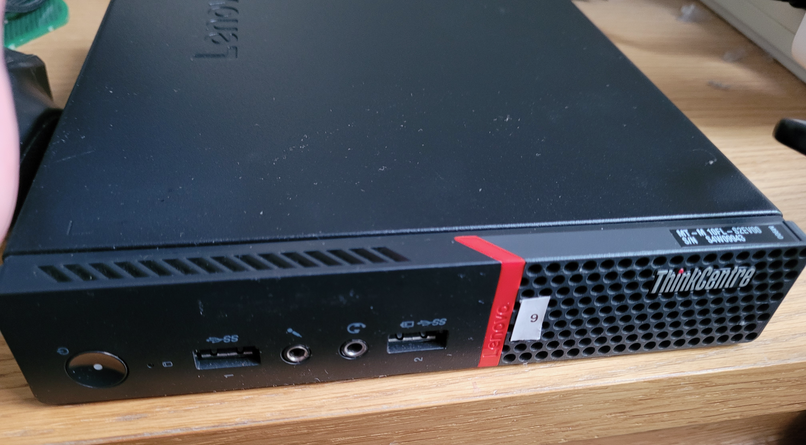
The PC did not fit into the little SoHo cabinet, I’d run out of room already and the bottom layer was consumed by surplus cabling. Maybe I could have rejigged some things around to make more room but it was becoming a hassle. So the PC ended up being put in the lounge upstairs and the fan in it was annoyingly loud.
So mistake no.1: don’t under-estimate or cheap out on your U’s, in hindsight I should have gone for a 9U or 12U cabinet
This, compounded with the fact that I had plans to get a NAS. I needed something bigger to accomodate all my things. I didn’t want all these devices dotted around my house because I’d run out of room downstairs. So the next expense was to upgrade to a 19” 12U open frame “network rack”* for about £60 with the power distribution strip. The bits for it arrived in flatpack format and just required some assembly.
* note there’s a key difference between “network rack” and “server rack”. Server racks tend to be a lot deeper, whereas my network rack is only 482mm deep (from what I understand)
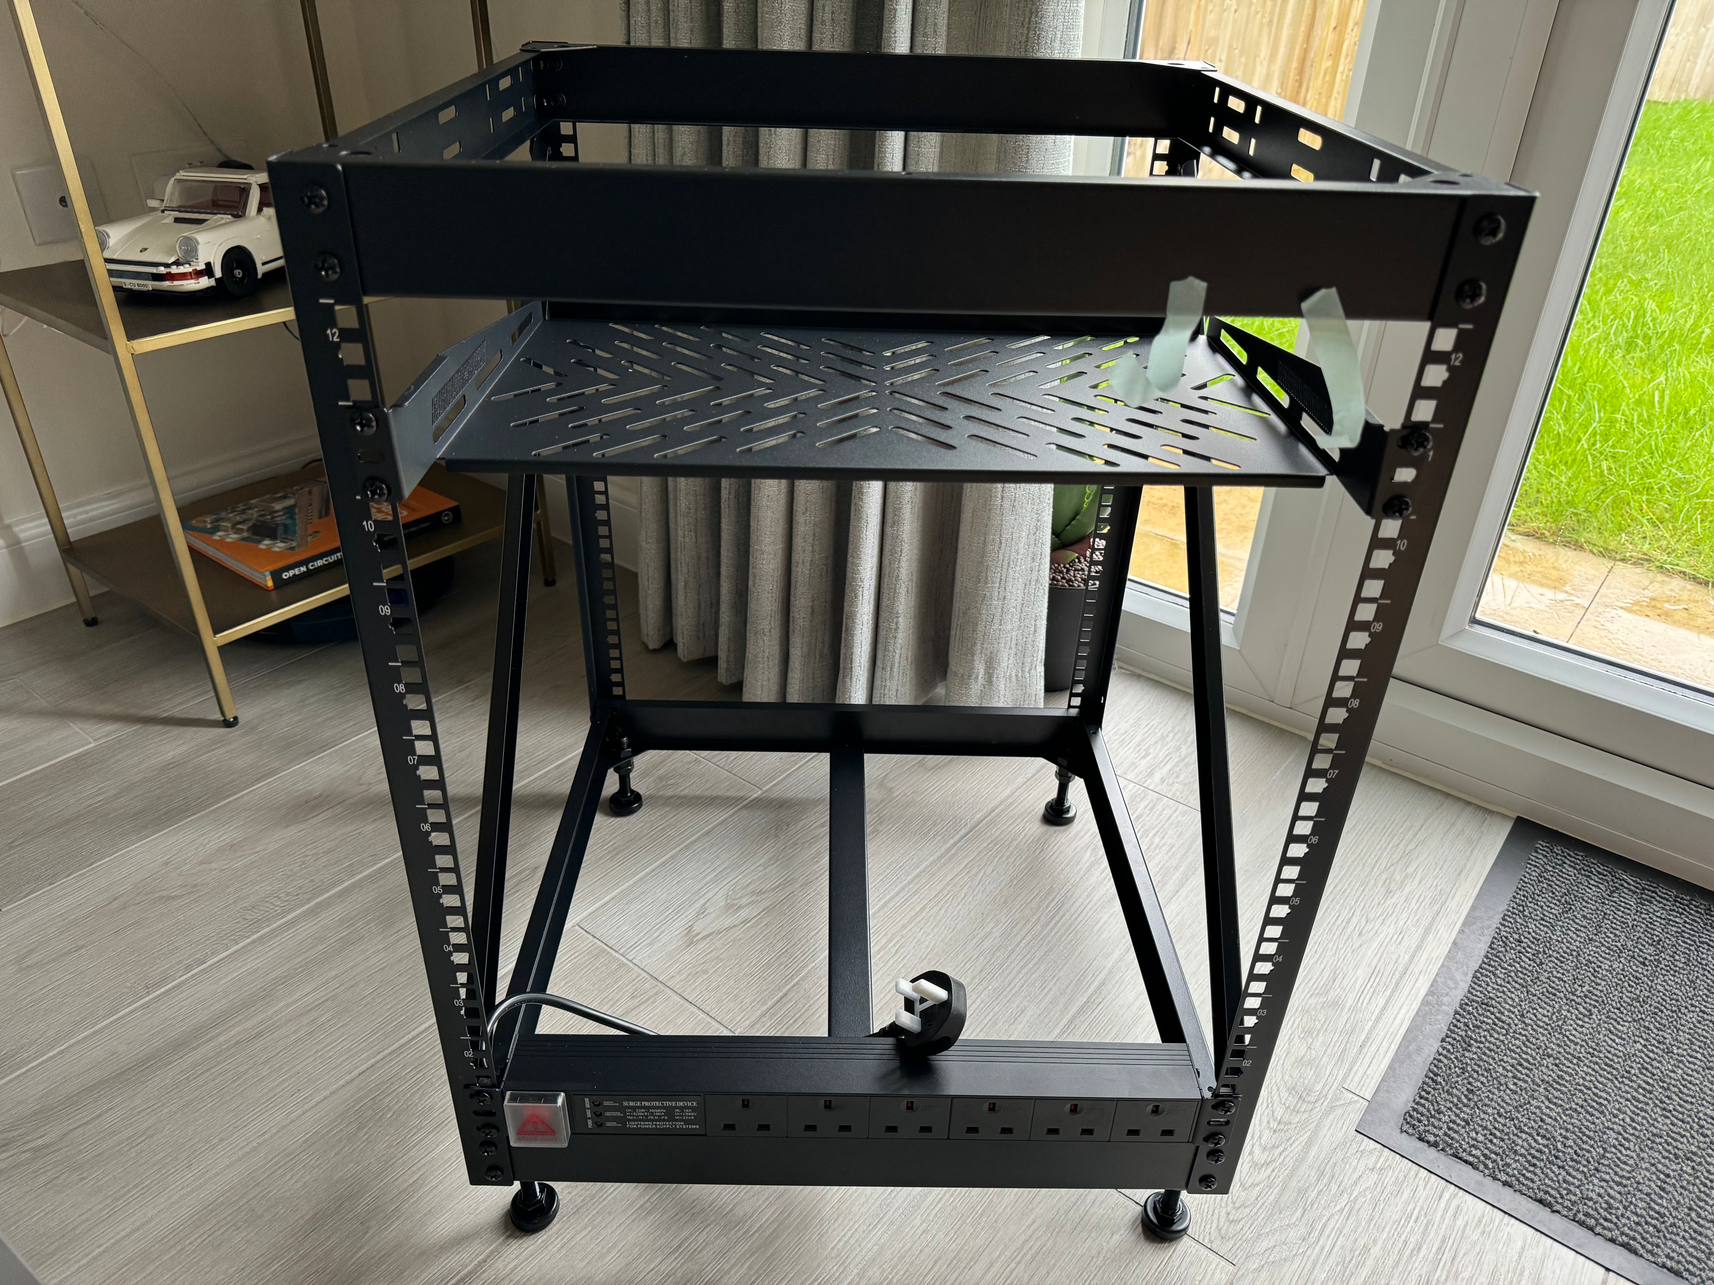
Afterwards I bought some more shelves to put my things on, and because I’m a cheap git I decided to re-use the 8 port patch panel from my old cabinet and designed/3D printed some “extenders” for the left/right parts so it could fit into the wider rack.

With that out of the way the Mini PC could be moved back downstairs and into the rack, along with the Omada gear and recently purchased NAS. Unfortunately the NAS takes up about 5U of space, but there’s still plenty of room on the shelves.
I even designed and 3D printed a custom mount for the Omada controller and router so I could mount it in 1U of space which took hours and had to be glued together in sections because the printer bed on my printer was too small. Turns out 19” is quite a large amount of space to fill. In hindight this was a massive waste of time because I got the sizing slightly wrong so the franken-rackmount did not fit into the rack properly, I should have just used a shelf and not tried to be clever.
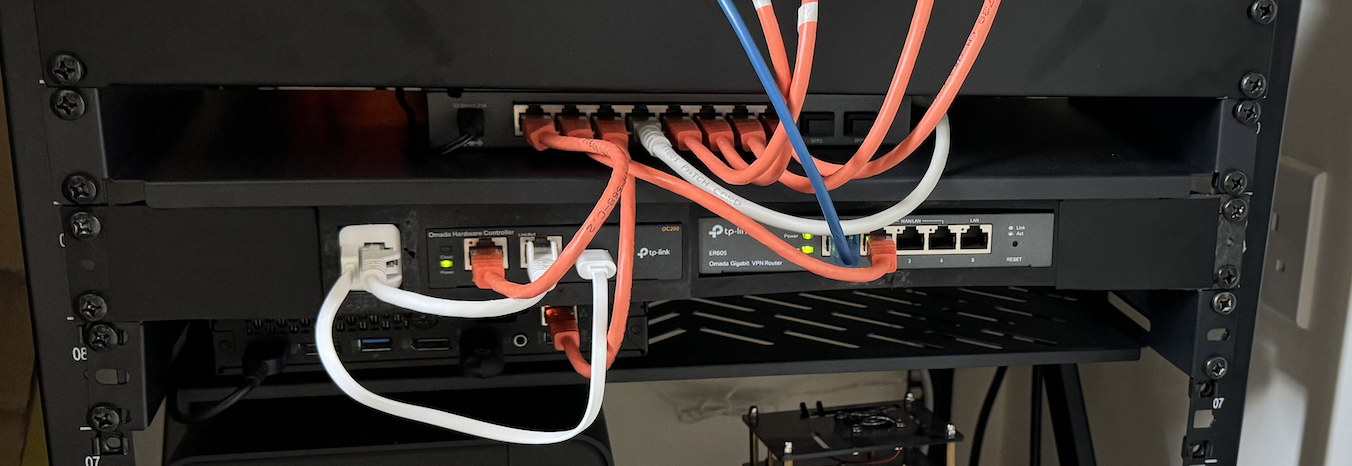
So mistake no.2: don’t try to be clever
Making it look nice
So, with all the stuff in place along with the janky 3D printed parts, there was one remaining niggle that bugged me to no end. The open frame leaves a big open gap at the top with all the wiring and power supplies and shame exposed to the open for you to look down on when you open the cupboard. I wanted to put something on top to make it look at least presentable.
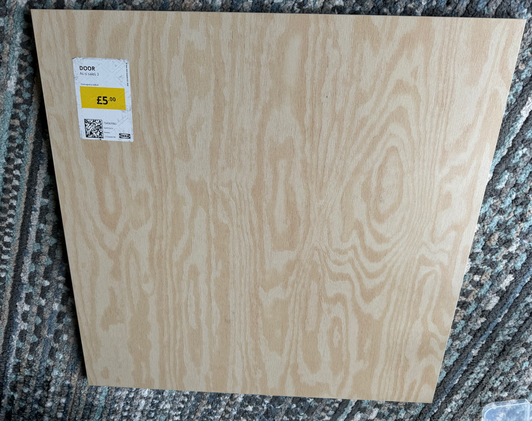
This led me to an annoying quest of trying to get some nice wood cut to size, the options were surprisingly expensive. In the end, I just happened to be in IKEA one day looking in their recycled/returns/re-use section and spotted a cupboard door with a slight mark on the bottom selling for as-is for just £5. It was 23” square and I got my Dad to help me cut two sections off to get it down to size.
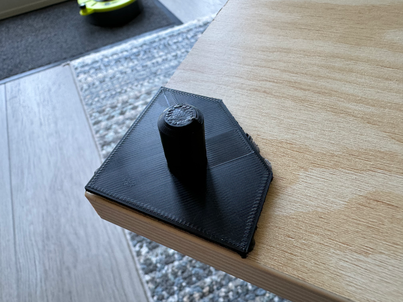
I quickly designed some 3D printed “pegs” to stick on the corners so they would fit into some bolt holes on the top of the rack (so the top can easily be lifted it off you need to access anything underneath)
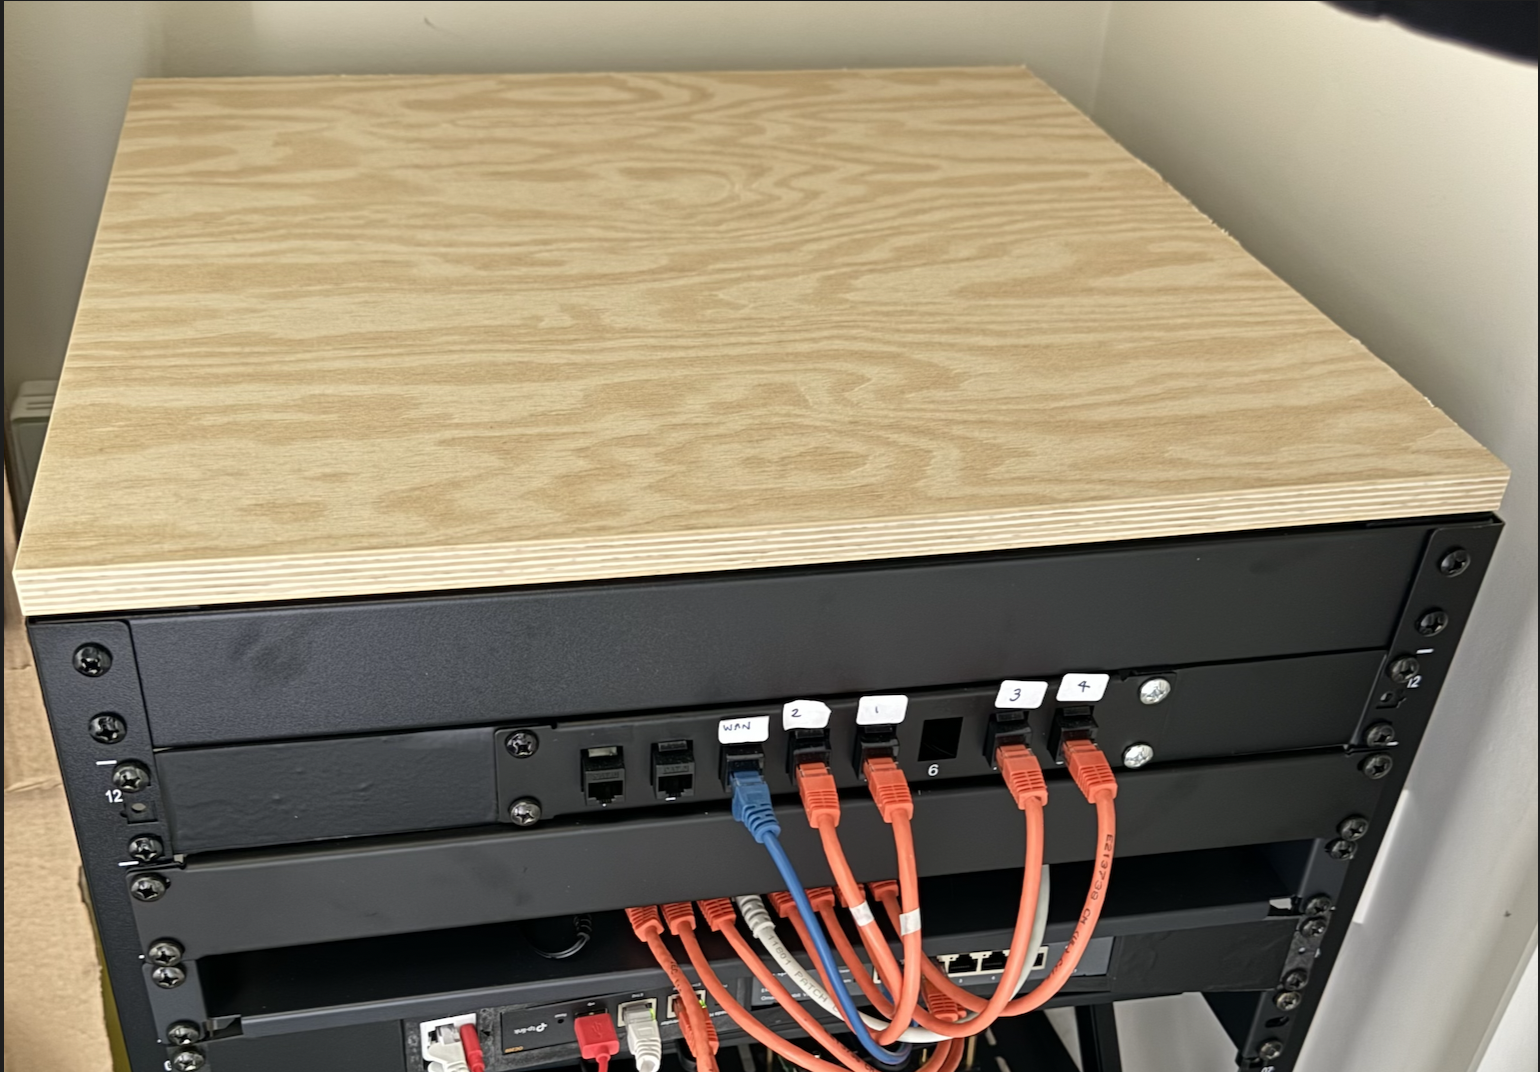
…and the result was very satisfying! Yes it’s not super high quality and 2 of the 4 edges are rough from the cutting, but the good sides are the ones and show and it looks miles better than just a mess of cables.
At this point I thought I was done, but the homelab quest never seems to end, and quite naturally, my next side quest led me to investigate IPv6, which led me down the completely irrational path of replacing all my Omada gear entirely.
Brief interlude: IPv6 woes
You see, it all started when looking into renting a cheap VPS from Hetzner. One of their options is you can cheap out and get an IPv6 address for free or pay extra to rent an IPv4. As you may have gathered with the running theme of this post, I’m not one to open my wallet more than what I have to…
So after setting up IPv6 on my network and everything was running in the future, alarm bells set in when I could connect to one of my services running on my homelab from the VPS by just hitting an IP address. Uh-oh, all my devices and services were exposed to the internet 😱!
Isn’t my router a firewall though? was my first immediate question, and yes it is, but that only works for IPv4. The version of my router was too old to have the firmware upgrade to support IPv6 firewalling. So every device on the network is exposed all the time when you enable IPv6 on this device. While scanning the IPv6 space is probably unfeasible anyway, I didn’t like the idea of all my stuff being out there so I came crawling back to the sweet, comforting embrace of IPv4.
This experience left a niggle in my brain that was difficult to shake, if the router doesn’t have the right firmware to support some features what else is missing? The rational and cheaper move would have just been to upgrade the router to a more recent model and be done with it - the modular nature of the Omada setup makes this relatively simple.
However…
Irrational changes
It was time to see what else was out there. I remember back in the day looking at Ubiquiti gear but was put off by the expense along with stock shortages that were going on at the time (2022-ish) it was terribly off putting. The cost could have been stomached somewhat but what really put me of was their flagship router - the Dream Machine Pro did not have PoE ports, so you had to purchase a separate switch. This easily pushed the cost to over £800 once you factored in access points in and other accessories.
But while researching I noticed Ubiquiti had released a new version of their Dream Machine Pro, the “SE” special edition version, which upgrades all the ports to PoE. This was quite a compelling case to me, my thinking was, this would allow me to replace the 3 TP-Link devices in my rack plus janky 3D printed parts, with just 1 device actually designed to be rack mounted and possibly - better hardware?
So I pulled the trigger and purchased
- 1x Dream Machine Pro
- 2x U6+ WiFi 6 access points
Wise? No. Expensive? Definitely. Makes me happy? Yes.

Outside of the IPv6 issue, which I think could just be resolved by upgrading the router, there really isn’t much wrong with the Omada setup so the takeaway shouldn’t be “Omada bad, Ubiquiti good” - it’s really just a few things fell into place for me to make the switch more compelling to me.
The switchover
Switching between ecosystems seemed daunting but actually it ended up being surprisingly smooth.
Initially I just setup the dream machine on a desk, connecting just one of the APs, and configured the WiFi network to have the same SSID+password as my existing one. When my iPhone connected to it straight away it gave me confidence that everything else should be able to connect just fine.
As for the wired stuff, most things had static IPs configured on the devices themselves or via DHCP reservations, so after whipping up a quick spreadsheet to map out all the important stuff, I got on with the task of bascially tearing out the Omada gear and getting the dream machine racked up, plugged in and all patch cables transferred over.
…and everything just worked? It was honestly surprising how seamless it was.
Well, OK, there were a few niggles. One thing that broke was my EV charger on the wall outside, while the device was present in the Unifi web interface it just wasn’t speaking to the internet for some unknown reason. A cold trip outside to flip a breaker sorted that out.
Another, more annoying issue was Airplay just refused to work. I listen to podcasts through an IKEA Sonos speaker in the kitchen when making dinner and whilst my iPhone could see the speaker, trying to play any stream through it just failed. It turns out Unifi turns multicast DNS off by default and I had to enable this AND restart my iPhone to make Airplay work - this took a while to debug.
You have to 3D print something though
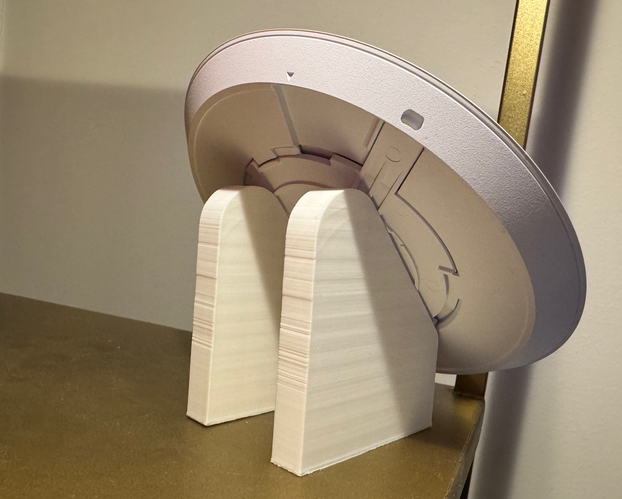
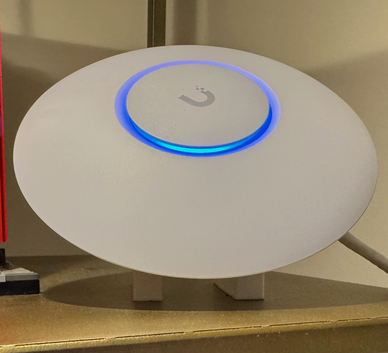
With the rack sorted and UDM in place my attention turned to the access points. I didn’t mount these to the walls/ceilings and didn’t with the TP-link ones either, instead I just designed and 3D printed these ‘legs’/stands for them to sit on and they rest on a shelf, one in my office and one on the other side of the house.
For the Unifi access points I just had to adjust the design for the stands as the hole placement is slightly shorter to fit the mounting bracket, but this did not take long and soon the APs were legless no more (after 8 hours of printing…)
You can find the design for these here on Printables
Wrapping up
Anyway, that’s everything up to this point I think. It’s been a journey. An expensive journey, but I’m really pleased with the final result**.
One pleasant surprise about the Unifi ecosystem has just been how snappy the web interface is. This is probably a product of the hardware being much better than the TP Link OC200, but it’s really good! The iOS apps are excellent as well and they have a really good WiFi debugging app called WifiMan that’s been invaluable.
As for IPv6? I might experiment once again soon, but I’m gonna do some reading on how to configure the firewall on the Unifi system properly first.
Thanks for taking the time to read xxx
** this is what I tell myself, but nothing is ever final
Bonus content: homelab overview
If you’re interested in what I run on my homelab here’s a quick overview. I might write a different blog post about my setup as I do some funky stuff with Tailscale and DNS and other things, but generally this is what I run:
Terramaster NAS
Hardware
- 2x 4TB Seagate Ironwolf HDDs
Software
- Unraid - I don’t do anything other than run Unraid on the NAS, I don’t run docker containers or VMs.
Server
Hardware
- Intel i5-6500
- 24GiB RAM
- 500GiB NVMe SSD
- 240GB SSD
Software - VM 1
This is the main VM that offers a bunch of network level things like DNS and HTTP proxy.
- Traefik - reverse proxy.
- Adguard Home - DNS level adblocker
- Tailscaled - Acts as a subnet router so I can access everything on my network via tailscale
Software - VM 2
- Librechat - for accessing all of the commercial LLMs via APIs wrapped in a nice interface
- Grafana - displaying graphs for everything
- Prometheus - metrics from everything inc. Home Assistant
- Fava - finance UI for beancount
- Paperless-ngx - document store for scanned documents/PDFs
- Gitea - self hosted git
- changedetection.io - tells me when stuff changes on websites
- Manyfold - 3D print model store
Software - VM 3
Home assistant basically. One day I might move this onto a separate machine.
- Home Assistant - controls everything in my house…
- DeCONZ - Zigbee gateway controller/interface for ConBee II USB stick
Software - VM 4
Media stuff
- Plex - watching movies/TV shows (streams off NAS)
- Navidrome - for my music collection (streams off NAS)
- Audiobookshelf - for my audiobook collection (streams of NAS)
- Software for finding and archiving linux ISOs
As a side note I wrote all these bullet points without links in them and asked an LLM to link to the relavent projects/pages and it did it!